
Our customers say that Automation Workshop is the number one tool for their automation needs. It is very easy to use, and it has virtually no learning curve · Automation benefits
This step-by-step tutorial will guide you through downloading, installing, and the basic configuration of Automation Workshop. Also, a simple Task will be created to demonstrate how awesome the Automation Workshop solution is.
How to download?
The very first step to start using Automation Workshop is downloading the software. Automation Workshop is available for both 32-bit and 64-bit versions of Microsoft Windows.
tl;dr
Choose the Universal installation package that will automatically detect and install an appropriate 32-bit or 64-bit edition on your Windows server or workstation.
32 or 64-bit?
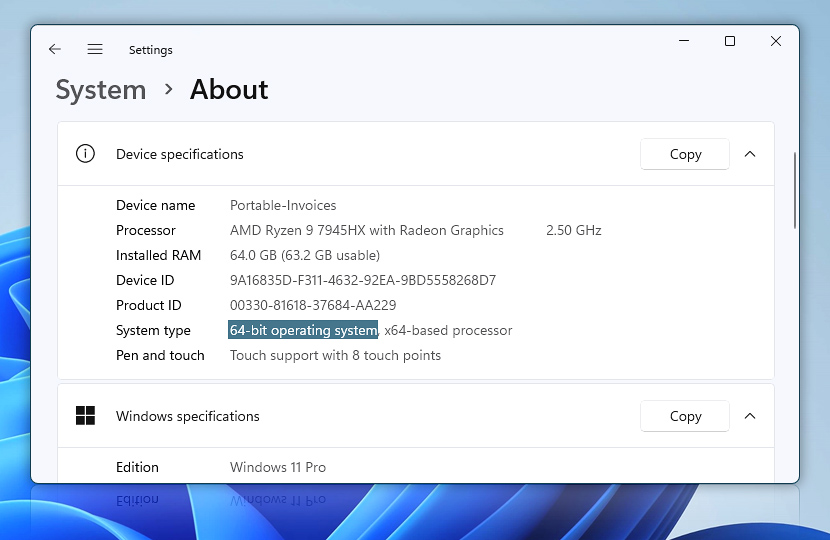
To check your System type, click the Start button, type About your PC, and press Enter. While the 32-bit version of Automation Workshop works on all systems, using the 64-bit version on 64-bit Windows systems may optimize its performance and resources.
When you are sure about your Windows version, go to the Downloads and choose the appropriate installation package. The 32-bit version of Automation Workshop is provided in self-extracting executable (.exe), ZIP archive (.zip), and Microsoft Installer (.msi) format. The 64-bit version is available in Microsoft Installer (.msi) format.
Again, you can always download the Universal installer that will automatically detect and install the most suitable version for your system.
How to install?
Locate the downloaded installation file and start the setup of Automation Workshop. This will open the Setup Wizard, which will lead you through a few simple installation steps.
Automation Workshop requires no additional third-party libraries, databases, or other software, making it 100% ready for deployment. The installation process is so straightforward that it typically takes about 15 seconds.
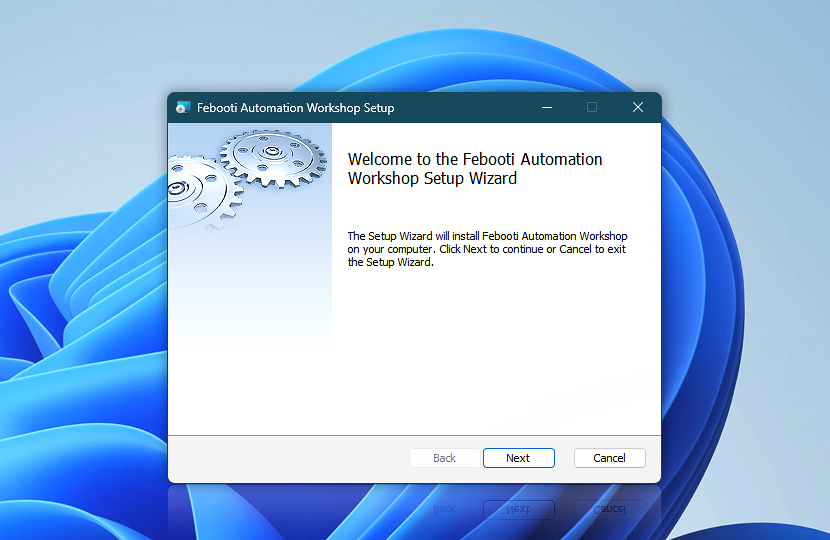
The setup is initialized, and Automation Workshop is ready to be installed.
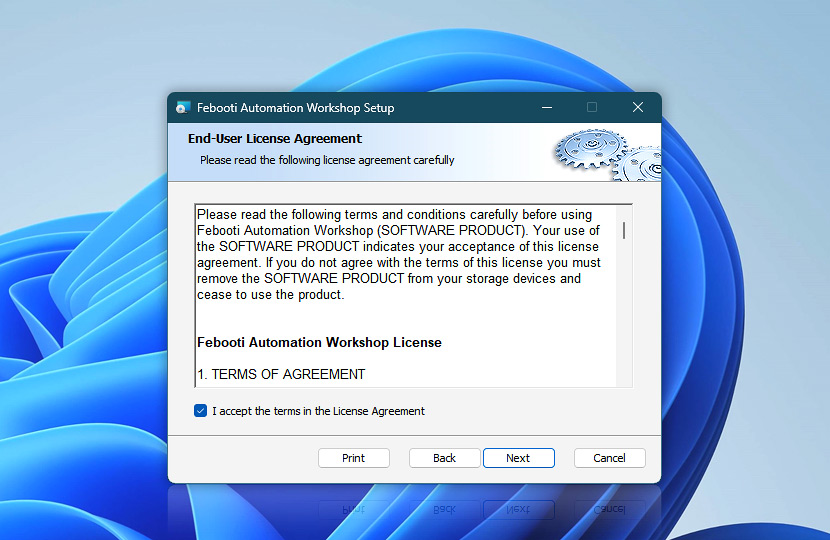
Read and decide whether to accept the terms of the agreement for using Febooti Automation Workshop.
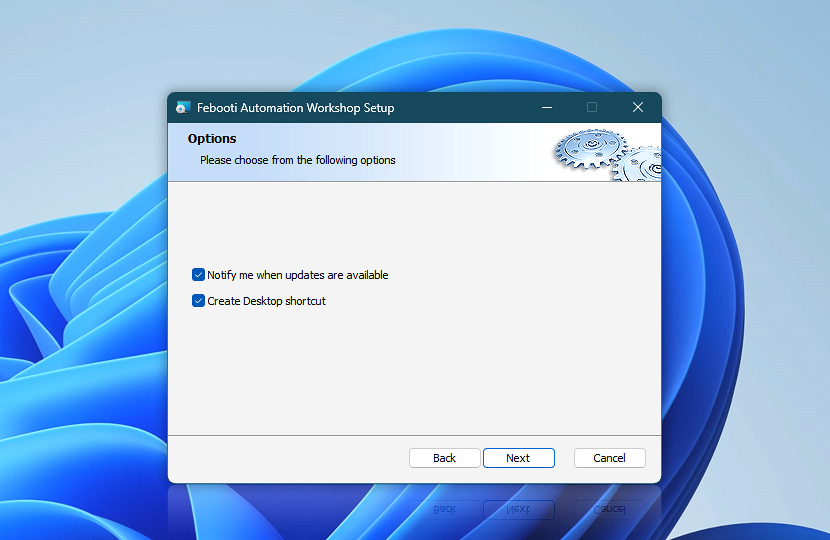
Enable or disable software update notifications, and choose whether to create a desktop shortcut.
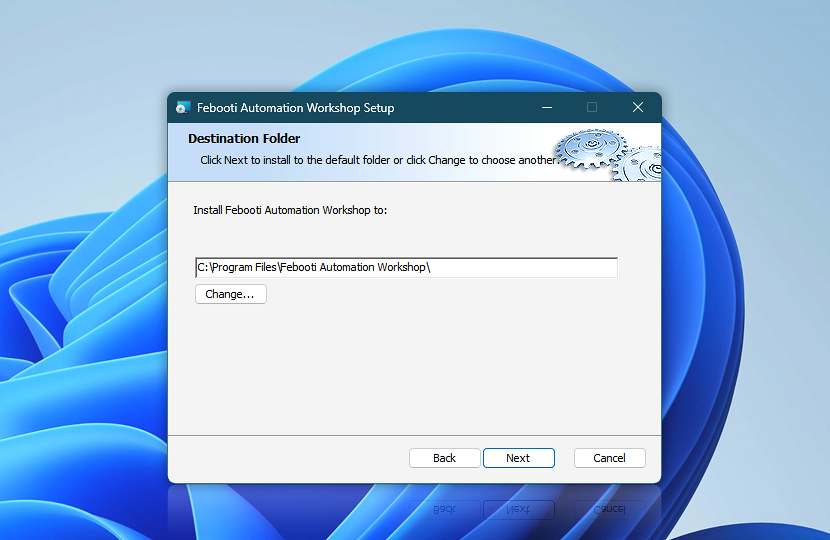
View or modify the Febooti Automation Workshop application folder path.

Click the Install button to actually start deploying Automation Workshop files and adding the application to the system.

Automation Workshop Services are also started during this step.
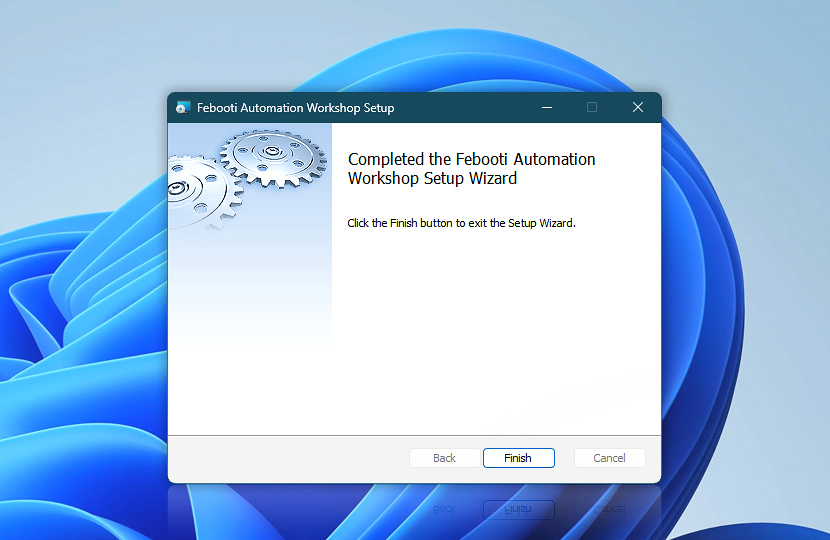
Congratulations! Febooti Automation Workshop has been installed in the specified folder. Click the Finish button to exit the setup application.
Start Automation Workshop
After installation, Automation Workshop Services are already running. However, the Automation Workshop Manager needs to be opened manually (just like any other application on your computer).
Locate Automation Workshop in the Start Menu or double-click its desktop shortcut to run the graphical user interface (GUI) of the software · See state-of-the-art automation tools
How to create a Task?
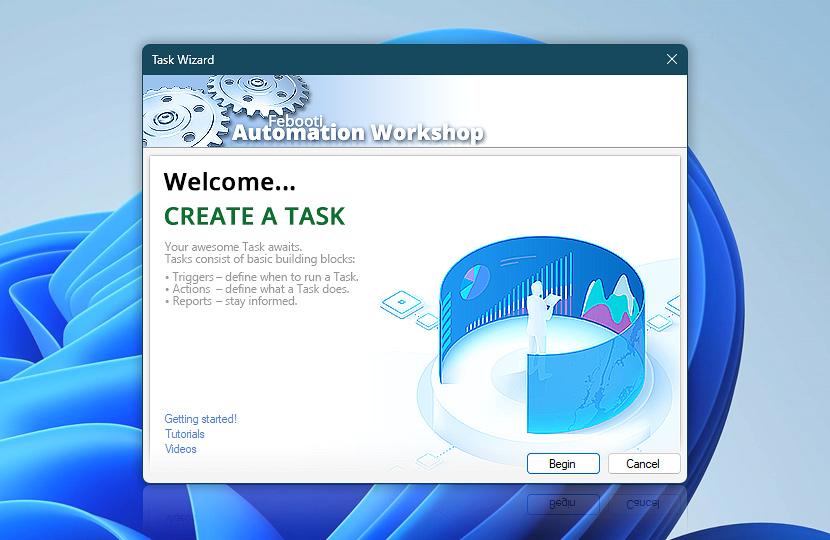
Choose New Task from the File menu to open the Task Wizard. The Task Wizard is a tool that allows creating and configuring Automation Workshop Tasks. During the process, the user is guided through seven steps of Task configuration.
Navigation through the steps is done by using the Next and Back buttons. You can return to one of the previous steps and modify the settings.
Welcome
Get acquainted with the basic concepts of Task creation.
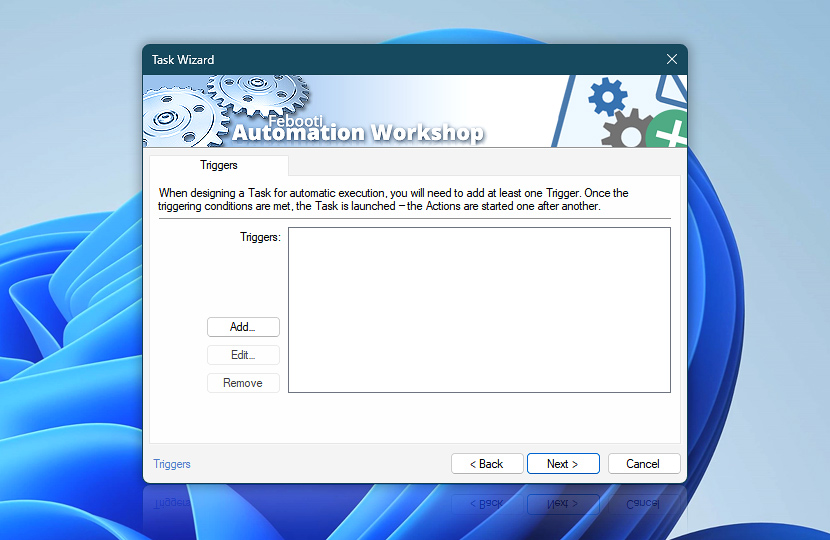
Triggers
Here, the user can add Triggers (conditions that, when met, automatically execute the Task).
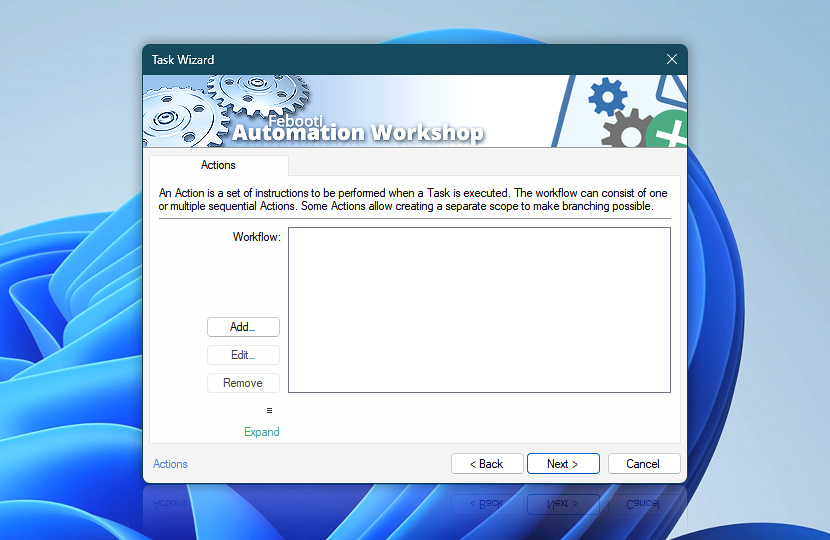
Actions
Here, the user can add Actions (operations that are actually performed upon Task execution).
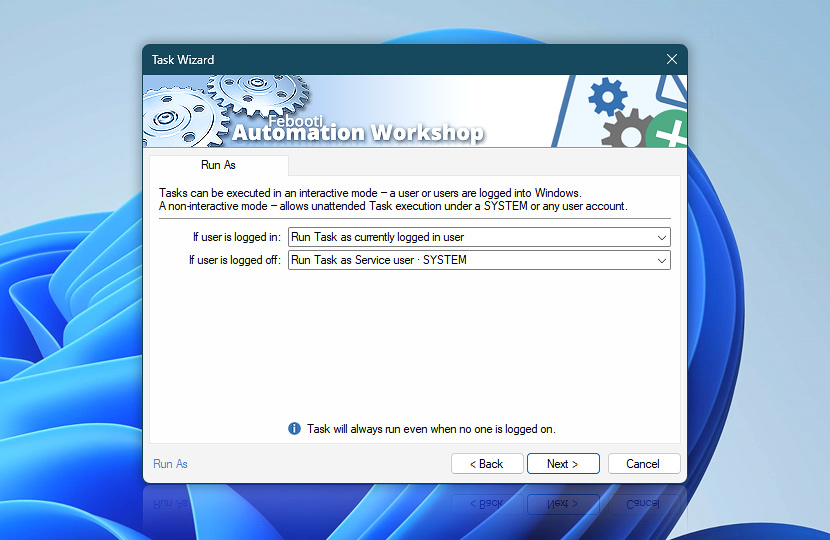
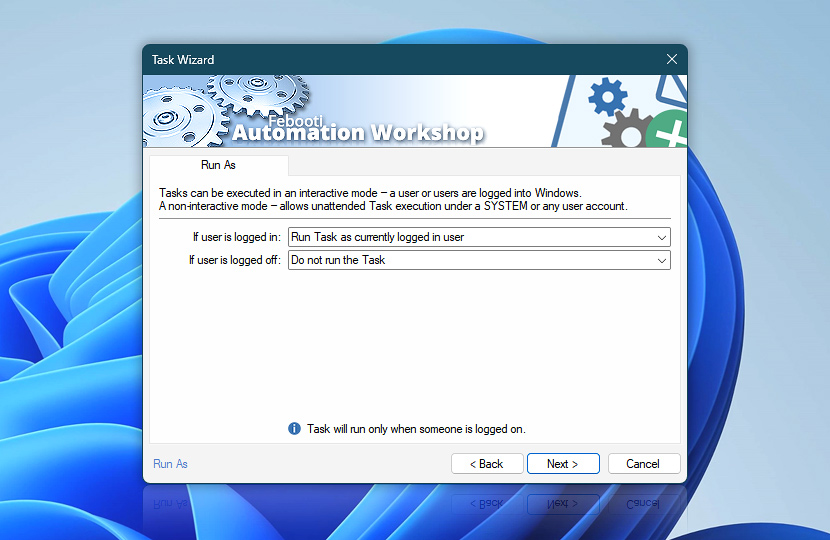
Run As
Specify the user credentials to be used when executing the Task.
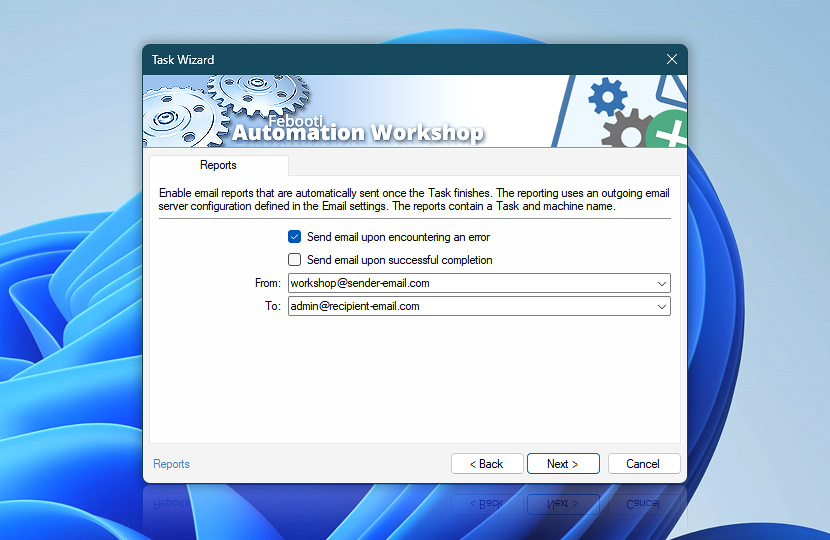
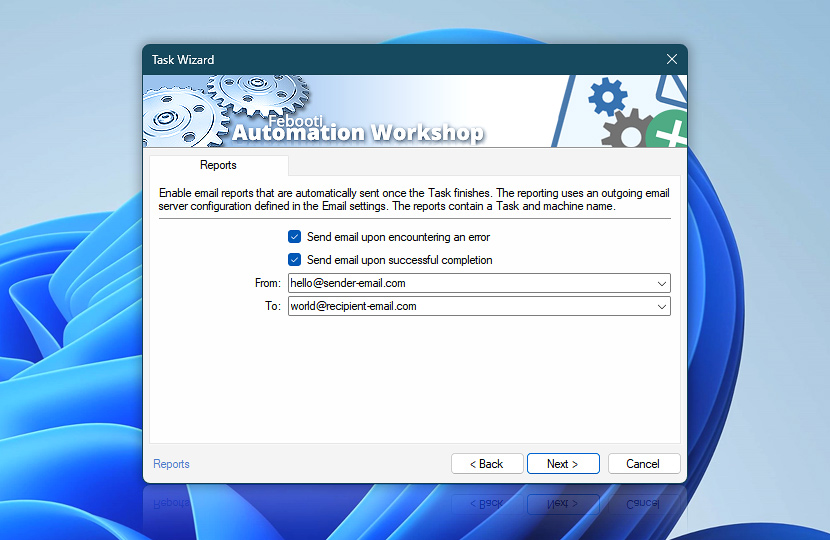
Reports
Choose whether successful or failed Task execution will be reported to a specified email.
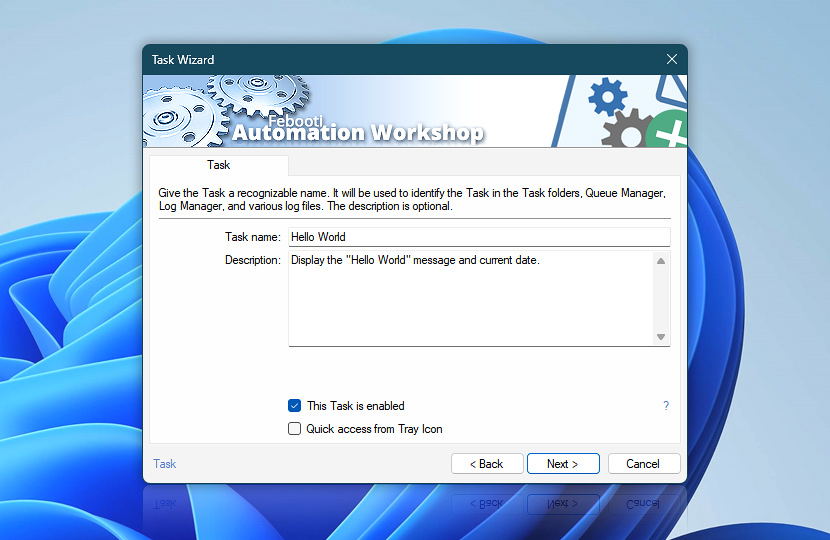
Task
Give the Task a recognizable name and, optionally, write a description.

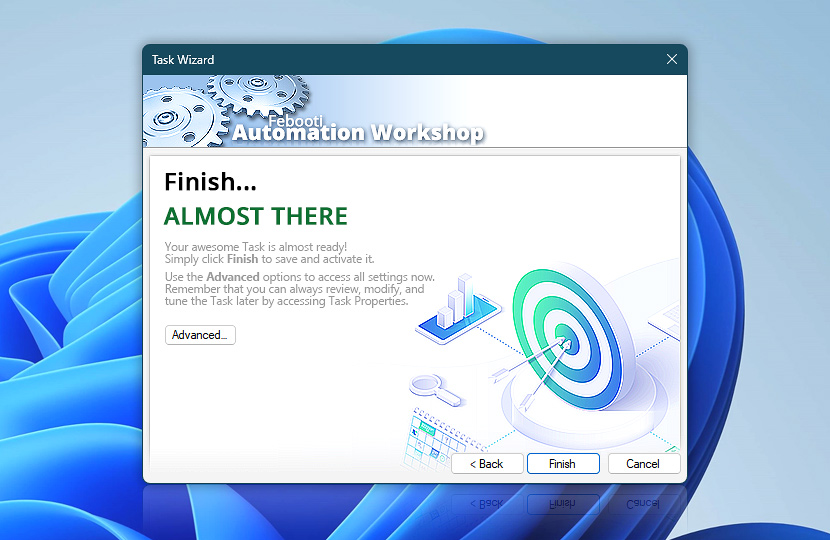
Finish
Congratulations! The Task has been created.
Push the Finish button to save and activate the Task, or visit Advanced options.
Create a simple Task
Let us create a simple Task that displays the Hello, World! message when manually started. Tasks that are started manually do not require Triggers (automatic execution conditions), so let us skip directly to the Actions step.
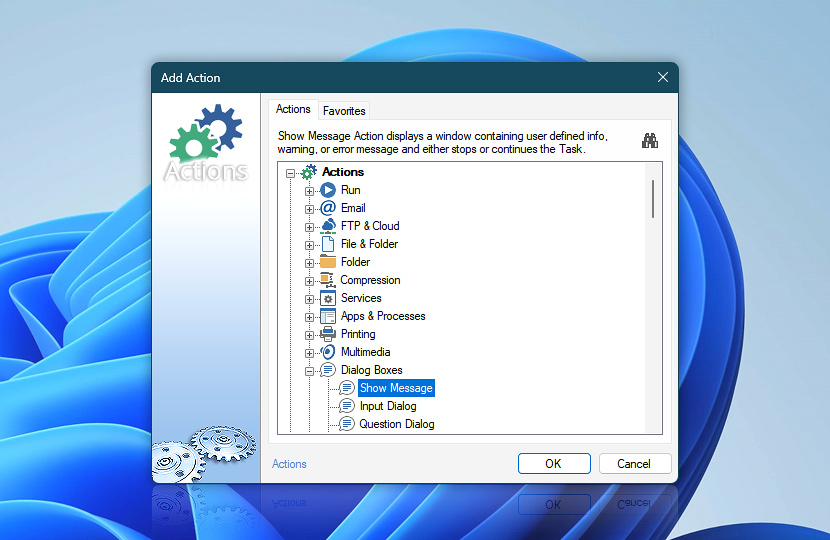
Once in the Actions tab, we have to add an Action that will display the Hello, World! message. Push the Add button and choose the Show Message Action from the Dialog Boxes category.
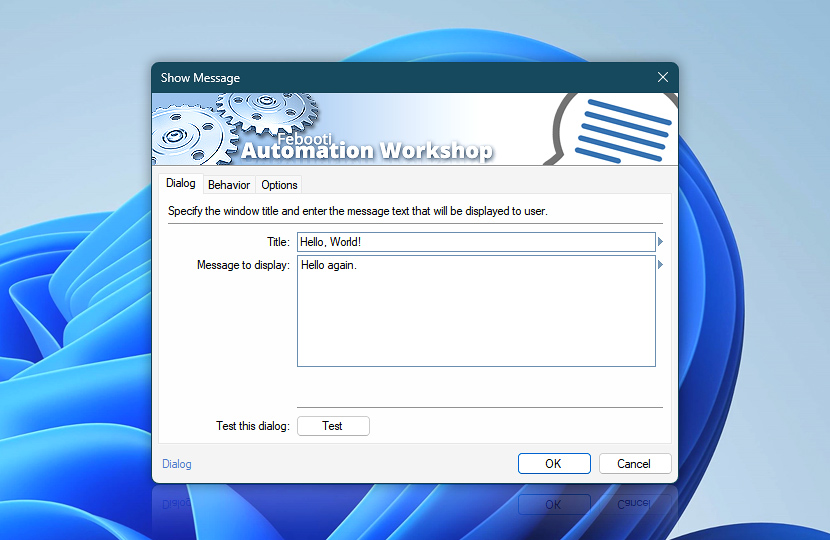
As you can see, the Dialog tab contains two parameters: Title, which specifies the message window title, and Message to display, which specifies what will be shown.
Put the cursor into the Title parameter input and type Hello, World!. Put the cursor into the Message to display input field and type Hello again there. The configuration of the Action is essentially completed at this point. However, let us see other available options:
Variable Wizard
While the cursor is still in the Message to display input field, notice the Variable Wizard button (on the right side of the field). It opens the Variable Wizard, which can provide dynamic values instead of fixed ones (including the output of previous Triggers and Actions, if they are associated with the same Task).
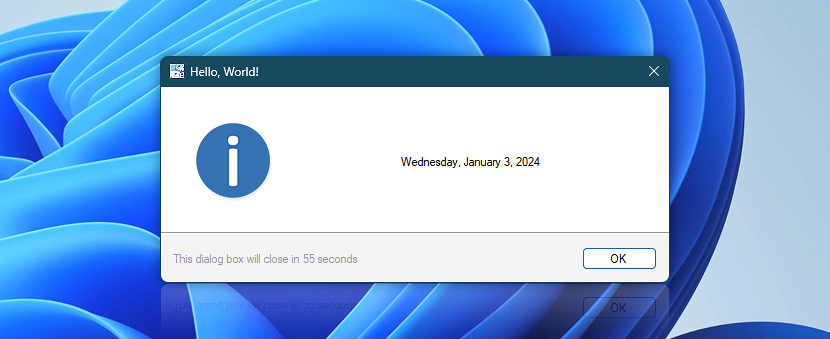
For example, the Date returns the current date, which is a dynamic value since it is different every day, in other words, the dynamic value is contingent upon the date when the Task is started. The Variable Wizard can return a number of both system-specific and Task-specific dynamic variables. Let us replace the text Hello again with the current date.
![Show message · [Date]](https://i.febooti.com/i/automation-workshop/tutorials/show-message-date.jpg)
Erase the Hello again text. Then, click the Variable Wizard button. Choose the Date variable from the Date & Time category and click OK.
More options
The most important options of all Actions and all Triggers are always placed on the first tab. However, the rest of the tabs may include other options that need to be specified or can be useful.
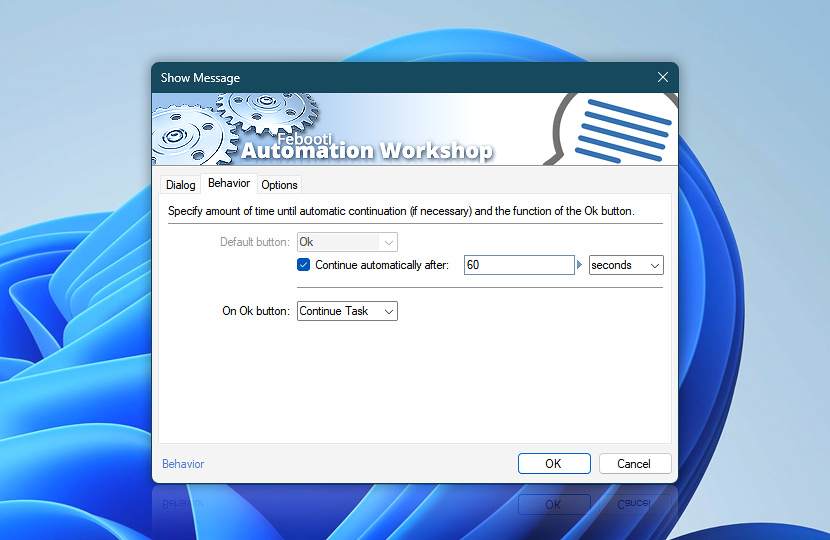
The Behavior tab of the Show Message Action allows specifying whether the message window will be closed automatically and how the Task will be continued. By default, the message window stays on screen indefinitely until it is closed by the user.
If you enable the Continue automatically after x seconds, the message window will be closed automatically after the specified time has passed. The On Ok button option allows specifying whether the Task will be continued or stopped after the Hello, World! message has been displayed.
The Options tab of the Show Message Action allows choosing whether to display an icon along with the message text and its type, such as information, question, warning, error, or none. You can test these settings from the Dialog tab by pressing the Test button.
Run As
When a Task is executed, it uses a specified user account to perform its Actions. For example, a folder or network share may or may not be accessible depending on the access rights of a particular user. Generally, you can choose to execute the Task from different user accounts depending on whether a user is logged in or not when the Task is started.
In our case, though, this Task can only be started manually due to the lack of Triggers. This also means that this Task will always be executed when a user is logged in. For this Task, the default setting to Run Task as currently logged in user will suffice.
Reports
When the Task completes (either successfully or with an error), it can send an email report. Mark the necessary checkboxes and specify the From and To addresses for email report delivery.
Task
Give the Task a name that will let you identify the Task later in the Task Pane of Automation Workshop Manager (e.g., Hello World). You can also write a short description if necessary. The This Task is enabled setting determines whether the Task will be operational immediately after finishing this Task Wizard.
Proceed to the Finish step and click the Finish button to save and activate the Task. The Task Wizard closes at this point, and the user is returned to the Automation Workshop Manager.
The Task Pane now should contain the newly created Hello World Task. You can run the Task by either selecting the Task icon in the Task Pane and pushing the Run button on the toolbar, or choosing the Run Task option from the context menu.
SMTP server
Setting the default SMTP server. Start the Hello World Task. Task execution details are displayed in the Log Pane of the Automation Workshop Manager. Note the "Could not send notification email: could not connect to SMTP server. The requested address is not valid in its context" error being displayed in the Log Pane.
To fix this error and avoid similar ones in the future, you should set up the default SMTP server, which will be used by default for all email-related operations (unless specified otherwise in each Task). Quick troubleshooting:
Open Options from the Tools menu and go to the Email tab. Enter your SMTP server with authentication settings and credentials (if necessary).
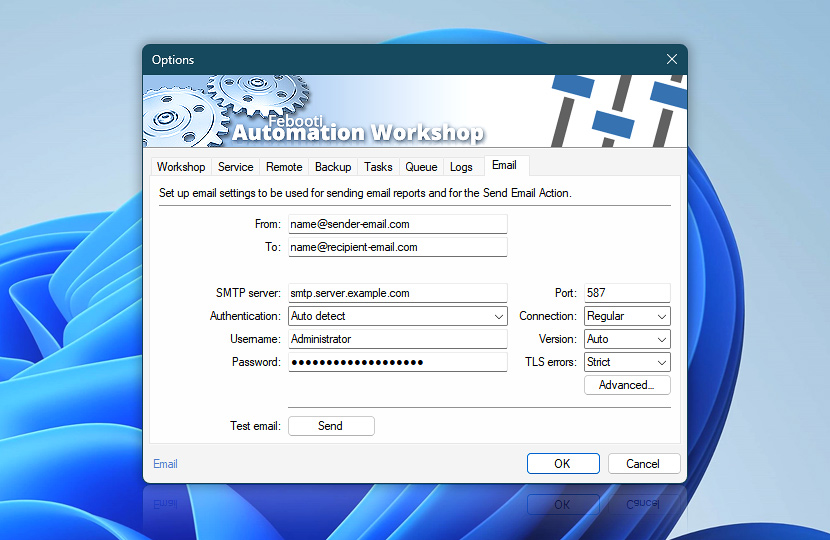
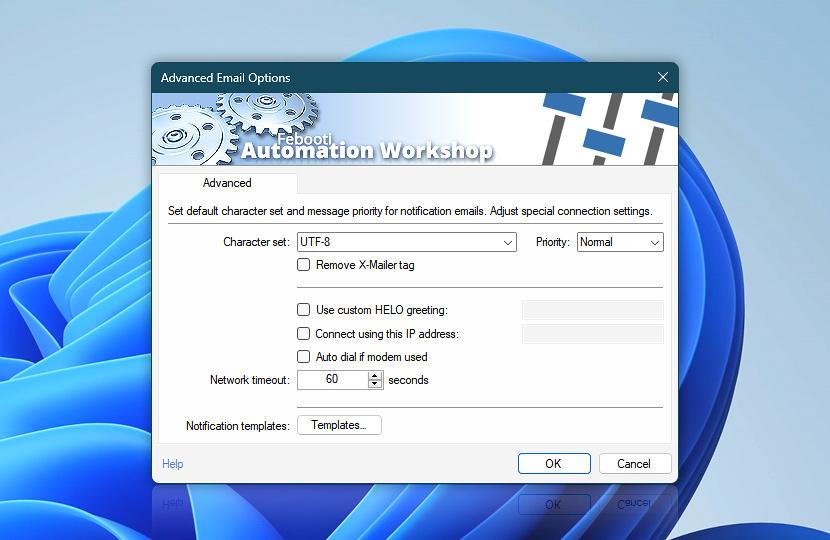
Provide From and To email addresses that will be used by default to send the Task completion notifications. Now, go to Advanced email options and change character set and priority settings if necessary.
Return to the Email tab and push the Send button to send a test email. If the test email successfully arrives at the specified mailbox, the SMTP server and notification email addresses are correctly set.
Log Manager
We have already seen the Log Pane that displays current information and error messages without any filtering. However, there is a more advanced log file viewer available in Automation Workshop.
You can access it by clicking the Log button in the Automation Workshop toolbar or from the Tools menu. Log Manager shows all events for a specified period of time. Additionally, log entries can be sorted, filtered by date, by event type, and otherwise. Read more on using Log Manager.
Triggers
The Hello World Task is a simple one. It does not even include any Triggers. Triggers are sets of criteria that, when matched, automatically start the Task.
Automatic Task execution is the main advantage of using Automation Workshop. The Task can be started when Automation Workshop detects some specific file activity, on a predefined schedule, or on some other system event. Learn more about Triggers.
Actions
This Task performs only one operation, namely, displaying the Hello, World! text on screen. There are many more Actions that allow not only performing numerous file operations but also sending email, executing external programs or commands in the Windows command prompt, and even automatic Task management functions. See the growing list of available Actions.
Further help
While using Automation Workshop, note the Help links virtually everywhere in the software. These links open a context-relative help page in your default browser. In most cases, the information provided is directly connected with the settings or other features of Automation Workshop currently in front of you.
Otherwise, feel free to visit the main section of the online help to access the comprehensive knowledge base dealing with every aspect of the program, and learn more about the rich functionality of Automation Workshop in the online knowledge base · Automation videos
Conclusion
This guide has shown how to download, install, and run Automation Workshop. A very basic Task is created to illustrate the main features of the software.
The Task created displays the Hello, World! message in a window (with the current date). Some basic insight into the idea of dynamic values of the Variable Wizard has been given, along with information on how to configure the default SMTP server for automatic email notifications.
Help at your fingertips…
If you have any questions, please do not hesitate to contact our support team.