
Let us suppose that .jpg image files are routinely uploaded to network share located on a machine running Automation Workshop. Every 90 minutes we would like to send all .jpg files to particular email address and erase them from C:\Share\ folder afterward.
Create a Task
How to create a new Task? Open Automation Workshop Manager and choose the New Task… option in the File menu (keyboard shortcut CTRL+N). Also accessible with right mouse click in Task Pane. It will open Task Wizard which will lead us through Task creation process.
How to add Task Scheduler trigger? After reading the Welcome screen click Next to get to the Triggers tab. Once there, click the Add button and choose Task Scheduler from the list of available Triggers.
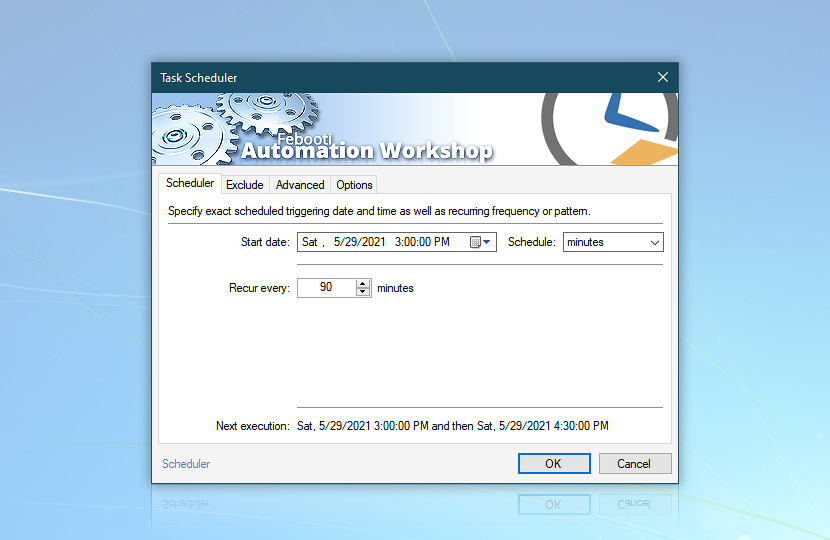
How to configure Task Scheduler trigger? Once Task Scheduler configuration is open, we see the default schedule with daily recurrence to begin soon after. Since we need the Task to run not once per day, but once per 90 minutes, change schedule type from daily to minutes.
Set appropriate Start date and configure Task Scheduler to Recur every 90 minutes. Click OK to return to Task Wizard, and click Next to proceed to adding Actions.
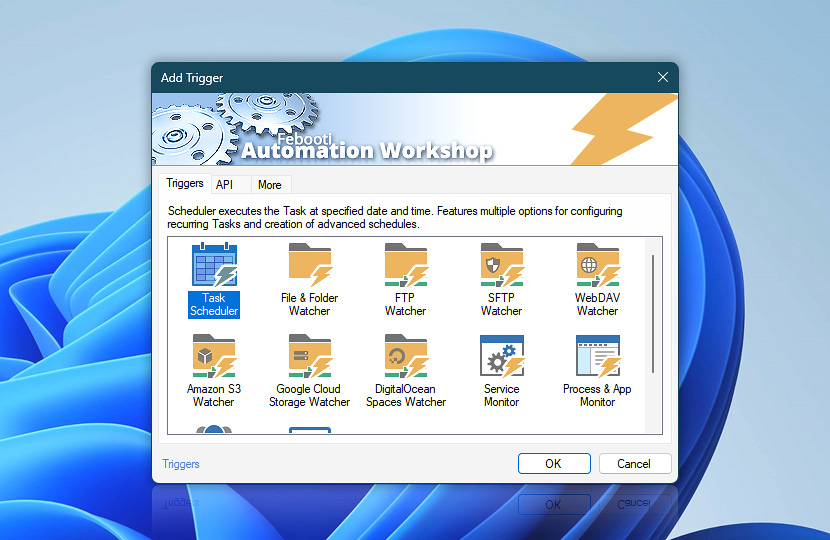
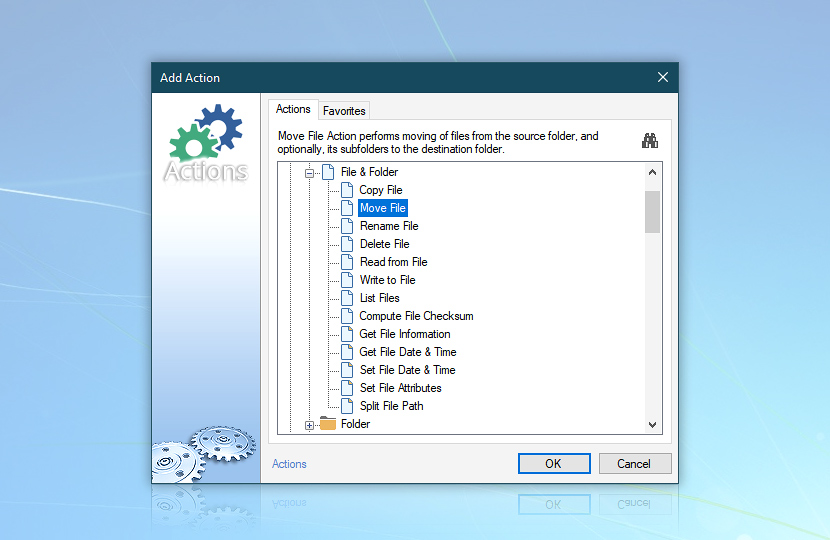
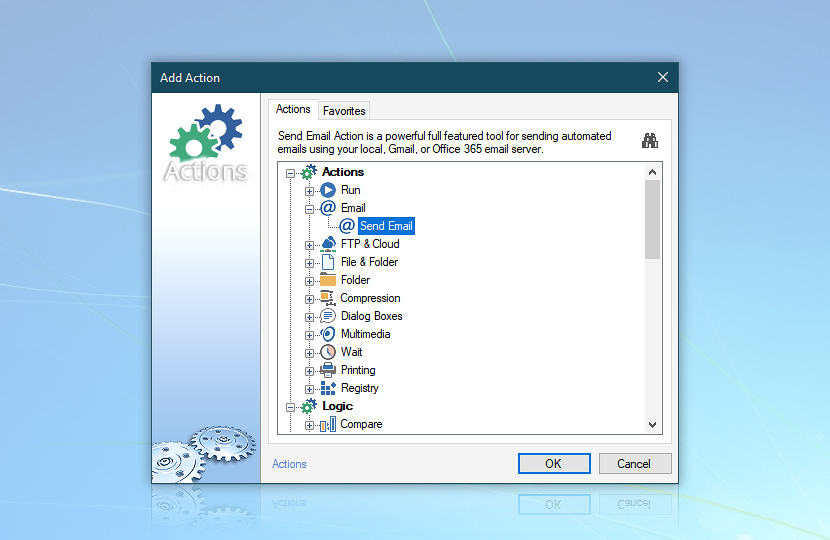
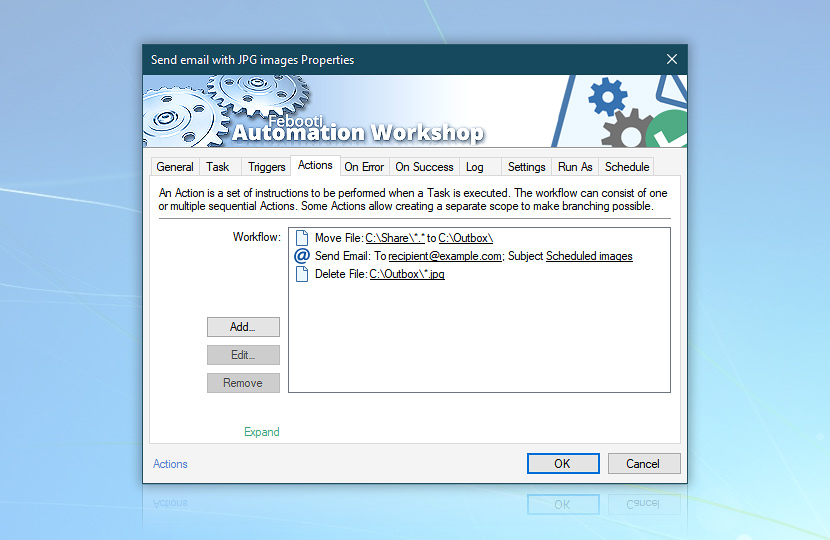
How to add an Action? To add an Action, click Add button in Actions tab of Task Wizard and select the necessary Action from the Add Action window list. Upon choosing the Action, its configuration is opened. When finished configuring the Action, it is added to the list of Task's Actions. The order of Actions in the list also means their execution order.
Move files
How to configure Move File Action to move files automatically? The first Action according to our scenario is Move File Action that will move all .jpg images from C:\Share\ to C:\Outbox\ folder. Add Move File Action to the Task. Now we need to specify which files will be moved (source) and to where (destination).
Let us start with the Source input line. First we need to specify the folder from which images will be moved. Put the mouse cursor into Source input line and click on Browse button. Browse to C:\Share\ and select any .jpg image file. If no files with .jpg extension are in the folder, select any other file. If the folder is empty, select any other file elsewhere.
The only purpose of browsing to C:\Share\ is to spare typing the folder path into Source input manually. Otherwise just enter C:\Share\ into Source input. Besides specifying the source folder we also need to indicate which files to take from that folder.
To indicate all image files with .jpg extension use *.jpg wildcard (where asterisk character * stands for all names and .jpg means with extension .jpg). C:\Share\*.jpg thus, should be the final parameter in the Source input.
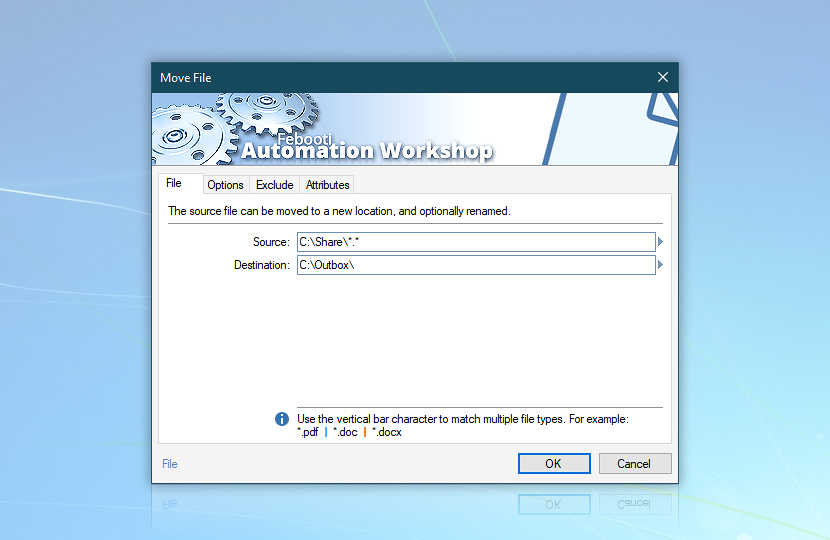
Setting up Destination is a bit easier. We just need to indicate the folder into which to move files specified in the Source input. Put cursor into Destination line, click Browse button and select C:\Outbox\ folder. (Use Make New Folder button in browse dialog, if non-existent.)
The Move File Action is now set to move files from C:\Share\ to C:\Outbox\ folder. Let us click OK and proceed with configuring the next Action.
Send email
How to configure Send Email Action to automatically send emails with attachments? Now we should set up Send Email Action which will take all .jpg images just moved to C:\Outbox\ folder and send them as email attachments.
Add Send Email Action and fill From, To, Subject and Email text with appropriate email addresses and text. As for attachments, we will need to use path to indicate folder and wildcards for file specification. Enter C:\Outbox\*.jpg into Attachments field. C:\Outbox\ indicates the folder from where files will be taken. *.jpg consists of asterisk symbol * (all files) and .jpg (with extension .jpg).
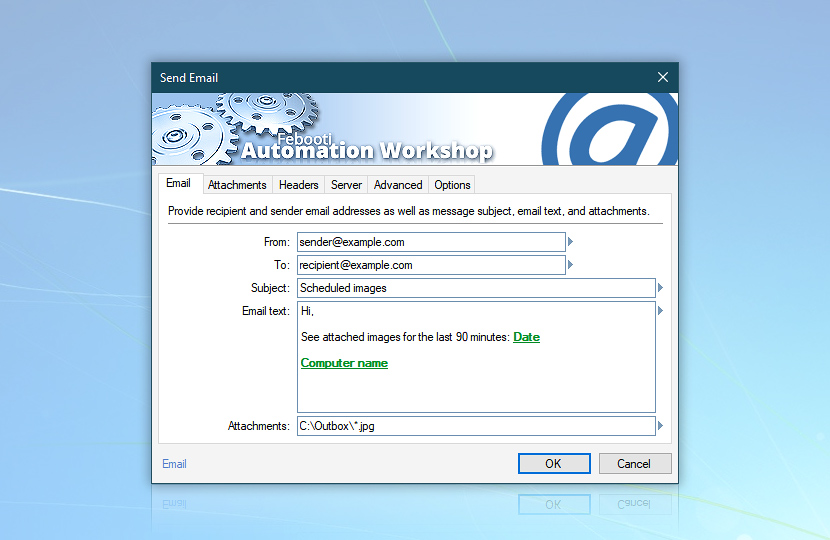
Provided that default SMTP server is set correctly in Email Server tab of Automation Workshop options, the setup of Send Email Action is finished. Click OK to return to Task Wizard.
Erase files
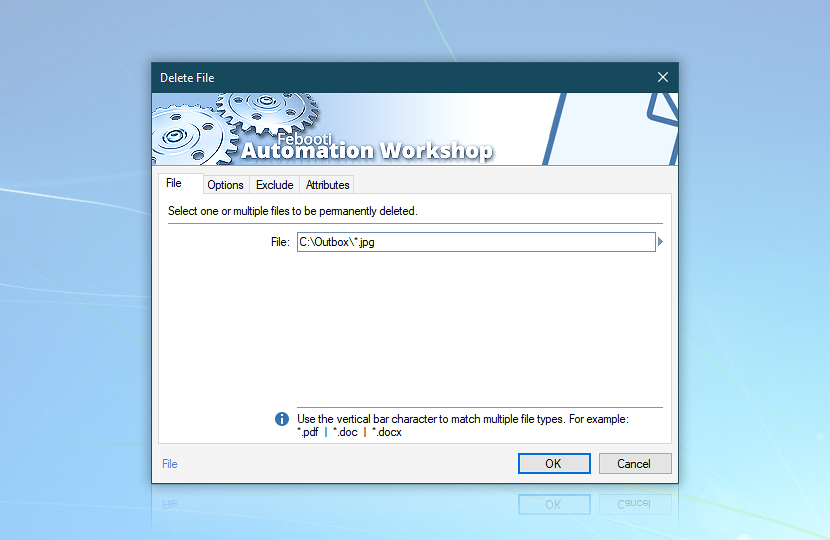
How to configure Delete File Action to automatically erase files? Add Delete File Action to opens its configuration. We will need to delete all .jpg images from C:\Outbox\ folder. In order to specify all .jpg files we will need to use wildcards once more. Enter C:\Outbox\*.jpg as File input parameter to specify all files with .jpg extension located in C:\Outbox\ folder.
When finished with configuring Actions, configure Task run parameters, configure execution email reports and give Task a distinctive name and description.
Dynamic attachments
Streamline file processing by ensuring that Automation Workshop processes the attachments that were actually attached to an email message. Use Variable Wizard to retrieve all attached filenames via Attachments variable.

Summary
Let see the example of how the Task works. Recently, files invoice.jpg, graph.xls and report.jpg were copied into the C:\Share\ folder. Then, file review.jpg were copied into C:\Outbox\ folder.
After every 90 minutes:
- Task Scheduler automatically triggers the Task execution.
- Move File matches wildcard
*.jpgand movesinvoice.jpgorreport.jpgfromC:\Share\toC:\Outbox\folder. Filegraph.xlsremains untouched. - Send Email uses wildcard
*.jpgto attach all files with.jpgextension, namely,review.jpgas well as recently movedinvoice.jpgandreport.jpgfiles. - If email sending completes successfully, Delete File action erases all
.jpgimages currently in the folder, namely,review.jpg,invoice.jpgandreport.jpg.
The Task has successfully finished, all involved files are deleted. The same operations will be repeated upon Task next execution in 90 minutes when Task Scheduler will trigger it again.
Alternatively, instead of Delete File Action to delete sent files, we can use Move File Action to move sent images to, say, C:\Sent Attachments\ folder rather than deleting.
In-depth analysis
Let us break down Task's design into its few basic elements.
First of all, in case of any Task, we need to understand when and why it is executed. In other words we have to give account on conditions of its execution. This time the Task is to be executed periodically, once per every 90 minutes. The appropriate Trigger for time based Task execution is Task Scheduler.
It would seem that we need to configure Send Email Action to send an email to specified address and use wildcards to specify all .jpg files to be attached to email message. However, considering that the images are erased afterwards, there is a little risk of the following scenario:
- Task Scheduler triggers the Task.
- Send Email starts sending email with all images from
C:\Share\as attachments. - While Send Email Action is still sending an email, new image file (e.g.,
invoice.jpg) is copied intoC:\Share\folder. - After Send Email Action has sent the email, Delete File Action tries to erase all
.jpgfiles fromC:\Share\folder. - As a consequence, the image files that have been copied into
C:\Share\after the Send Email Action has started to send an email (invoice.jpgin this case) will be erased without being sent at the first place.
Solution after analysis
In order to avoid such a scenario, the Task should be designed in a slightly different manner. Let us consider that the images before being sent are moved to another folder C:\Outbox\ and only after that attached to email message, sent and erased. It would result in the following:
- Task Scheduler triggers the Task.
- Move File Action moves all
.jpgimages fromC:\Share\toC:\Outbox\folder. - Send Email starts to send an email message with all
.jpgimages fromC:\Outbox\folder attached. - Even if during email sending some new images are copied into
C:\Share\it is not relevant for Delete File action that, upon completion of email operations, erases all.jpgimages fromC:\Outbox\folder.
The second step, thus, consists of configuring the Move File Action to move all .jpg files from C:\Share\ to C:\Outbox\ folder. In order to specify all .jpg files, appropriate wildcard will be used.
In the third step we will use the Send Email Action to send an email to specified address. We will also use the path and wildcards to specify attachment files. Finally, we will use wildcards to specify which files will be erased upon execution of Delete File Action.
Help at your fingertips…
If you have any questions, please do not hesitate to contact our support team.