
Sometimes it is necessary to execute an automatic operation when a Windows user logs on. Usually, some logon triggers or complex scripts are written to carry out this task. Automation Workshop effectively replaces the need for these scripts. Its built-in User Logon & Logoff Trigger detects when a user logs in or out of the system. Equipped with a user-friendly interface, the Trigger is easily configurable to execute its associated Task designed to perform a variety of Actions (built-in operations) or run external applications.
Overview
This example shows how to create a Task that will be triggered every time a user logs in to the system. The Task itself will write the current date and time to a text file and then automatically open that file in the Notepad application. While the date and time will be written to a text file by the Write to File Action using the Date & Time variable, opening the file in the Windows Notepad application implies using the Start App Action.
Create a Task
How to create a Task? To create a Task, open the Automation Workshop Manager and choose the New Task option from the File menu. Alternatively, right-click in the Task Pane and choose the New Task option from the context menu, or press the CTRL+N keyboard shortcut when the Febooti Automation Workshop window is active. This will open the Task Wizard, a tool for creating and configuring Tasks.
Configure Trigger
How to add and configure the User Logon & Logoff Trigger? Once in the Task Wizard and acquainted with the information on the Welcome page, click Next to go to the Triggers tab. Click the Add button to open the list of available Triggers. Since the Task is to be executed when a user logs in, the Trigger to choose is User Logon & Logoff. Select the User Logon & Logoff Trigger and click the OK button.
This will open the Trigger properties which allow specifying the conditions for Task execution. The default option is set to execute the Task upon the logon of any user, which is perfect for this Task. Other options are to execute the Task when a user logs off the system. You can also set the Trigger to monitor the system for logons or logoffs of particular users.
![User Logon & Logoff: Trigger when [any user] logs in](https://i.febooti.com/i/automation-workshop/tutorials/user-logon-logoff-trigger-when-any-user-logs-in.jpg)
The Options tab of the User Logon & Logoff Trigger properties allows the user to specify how much time after a user logon the Task will be executed. The default option is 30 seconds, which can be changed to allow the system to fully load the user environment and applications before starting to perform automated Actions.
The Options tab also allows for specifying how many times the user should log in before executing the Task. By default, the Task is executed upon every login, but it can easily be changed to run the Task upon every second, every third, etc., login.
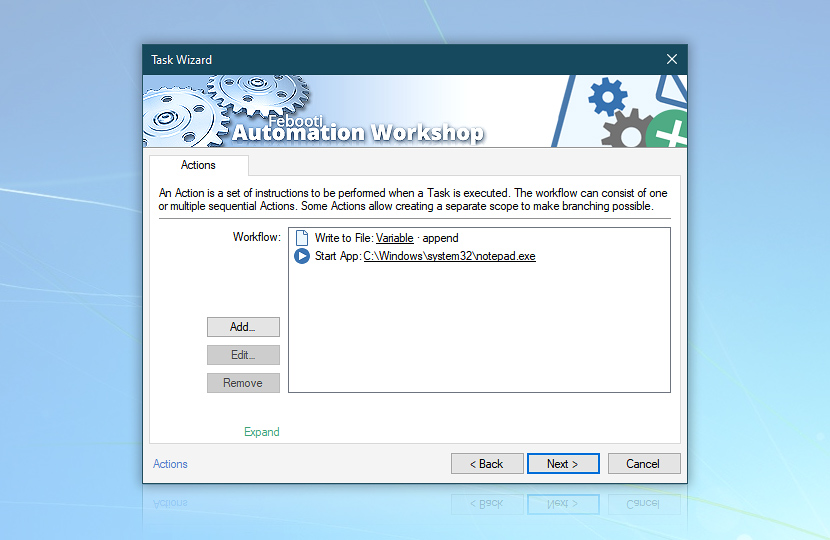
Click OK to save the Trigger settings and notice the User Logon & Logoff appearing in the Trigger list. Click Next to go to the Action section.
Write report
How to add the Write to File Action? When in the Action tab of the Task Wizard, click the Add button. The list of available Actions will be provided, similar to when adding a Trigger. The first part is to write the current date and time into the file. Choose the Write to File Action in the File & Folder category and click OK.
Now you must specify both the file into which the text will be written and the text itself. When specifying the file name, we can use a fixed or dynamic value. If a fixed value is used, the file name will always be the same every time the Task is executed. The dynamic value, on the other hand, allows for creating different files upon the logons of different users. The file name specification in this case is associated with the User Logon & Logoff Trigger by using the Variable Wizard.
In this example, the Variable Wizard will be used to provide a separate file for each user. Put the cursor into the File input line and click the Browse button. Go to the necessary folder, e.g., C:\Logon Reports\ (create the folder if it is non-existent), and enter file.txt into the File name input. Click the Open button. The File input now contains the C:\Logon Reports\ parameter. Select the file part of the filename and click on the Variable Wizard button. This will open the Variable Wizard.
Since the filename has to match the username, choose the User Logon & Logoff in the Trigger category. Choose the Username variable and click OK. Notice that instead of the fixed C:\Logon Reports\ value, the File input line contains C:\Logon Reports\Username.txt where Username is a dynamic value which is always determined by the user who is logging into the system.
Now, you have to specify the text itself by adding the Date & Time dynamic variable which will always return the current date and time. Put the cursor into the Text to write text box and click the Variable Wizard button.
This time, the value is not to be taken from the User Logon & Logoff Trigger but is provided by variables in the Date & Time category. Choose the RFC 1123 preset from the Date & Time subcategory Presets and click OK to return to the Write to File Action properties. Notice the Date dynamic value in the Text to write input. Each time the Action will be performed, the actual date and time will be written into the text file.
Note that instead of using the RFC 1123 preset, which was chosen because it contains both date and time in a standard international format, you can choose any other Date & Time variable (or even combine multiple components) to get the necessary Date & Time format.
![Write to file: C:\Reports folder\[Username].txt](https://i.febooti.com/i/automation-workshop/tutorials/write-file-reports-folder-username.jpg)
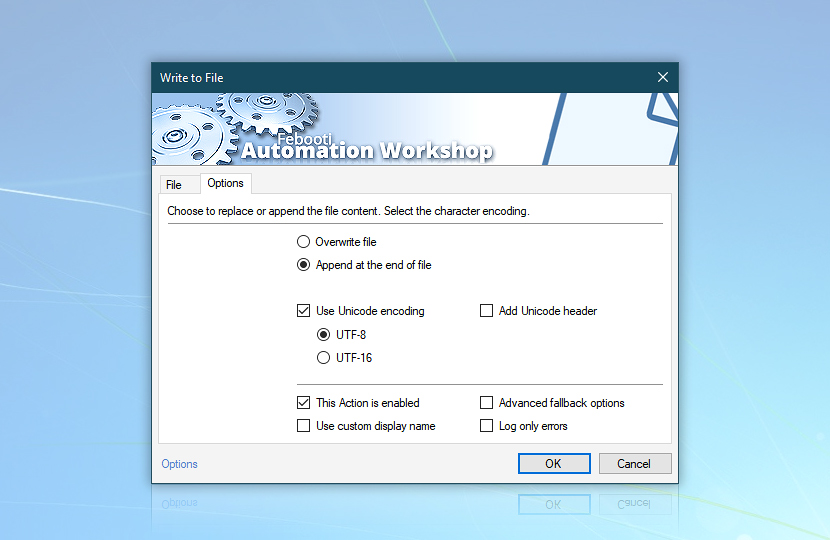
The Options tab of the Write to File Action allows choosing between overwriting the file each time or appending the new text to an already existing file. If the Overwrite file option is chosen, each user's file will contain only the date and time of the most recent logon.
The Append at the end of file option, on the other hand, will keep the login history of each user since the implementation of automated user logon tracking. Choose the appropriate option and click OK to save the Write to File Action parameters.
Start program
How to add the Start App Action? The final part consists of opening the file with the user login date and time in the Notepad application. Automation Workshop uses the Start App Action to execute external applications. Click the Add button once more to add another Action. Choose the Start App Action from the Run category and click OK to enter its setup.
Click the Browse button on the Program input line, locate Notepad on the disk, and click OK. The Program input line now contains the path and filename of the Notepad application (e.g., C:\Windows\).
To specify which file will be opened by the Notepad application, the Arguments input must be used. Since the file name matches the user login name, there are two options. Namely, to use the dynamic Username variable from the User Logon & Logoff Trigger or the dynamic variable of the recently written file from the Write to File Action called Last file.
The latter is preferable in case you would like to retain the Task's functionality even after changing the file name in the Write to File Action later (or, for example, combining the file name from the dynamic Username part and some other fixed or dynamic value). Put the cursor into the Arguments input and press the Variable Wizard button. Now, select Write to File in the category Actions and choose the Last file variable. Click OK and notice the Last file dynamic value in the Arguments input.
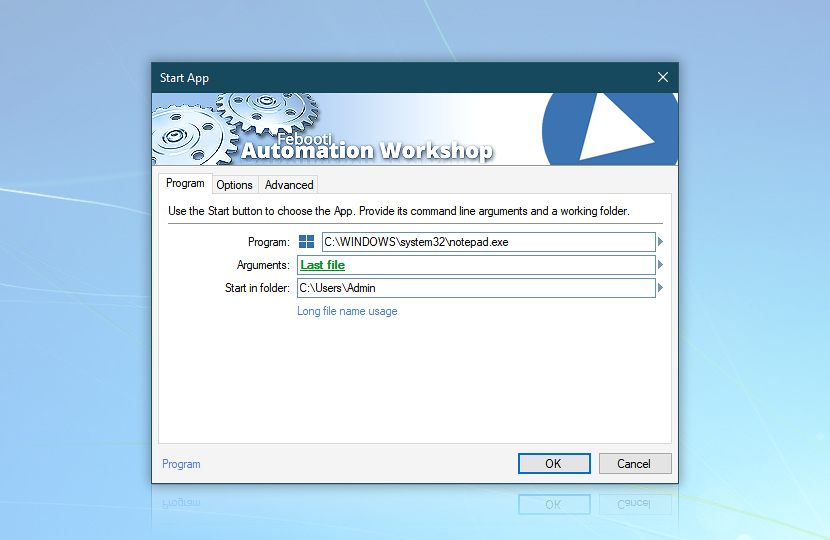
The Notepad application will always automatically open the file into which the date and time has been written recently. Click OK to save the Start App Action settings and return to the Task Wizard.
Finalize Task
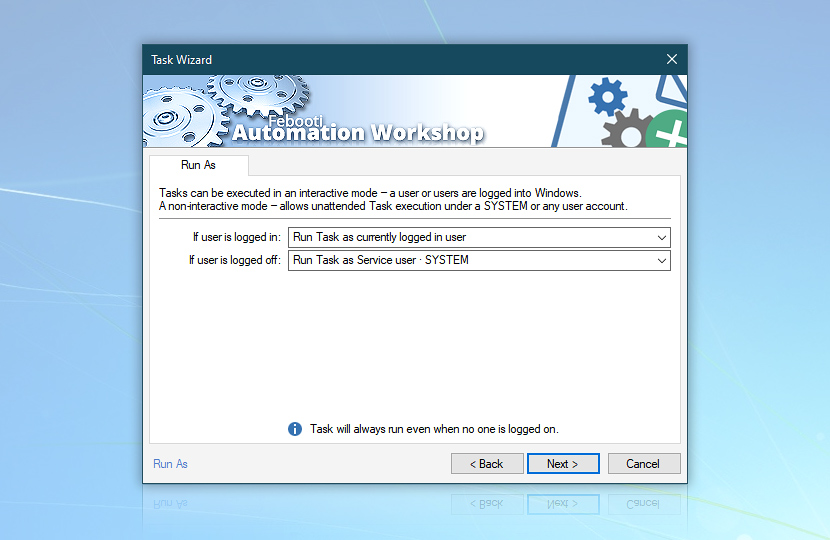
Click Next to go to the Run As settings. Notice that the current example implies Running the Task as the currently logged-in user. However, in some cases, it can be useful to run the Task with the credentials of another user in a parallel environment.
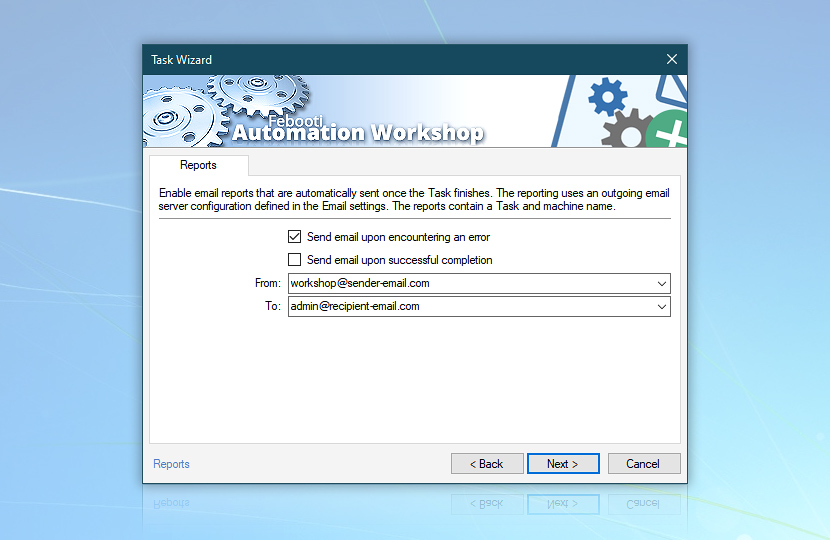
Click Next and configure email reports. Choose whether you want to receive an email notification when the Task is finished successfully, has failed, or both.
Click Next to go to the Task tab where you should give the Task a name (e.g., track users logon) and, optionally, a description.
Continue to the Finish tab and click Finish to save and activate the Task or, alternatively, the Advanced button to review reporting, logging, and other options.
Conclusion
While opening Notepad with the logon date of the current user is a rather trivial matter, Automation Workshop is by no means limited to it. Instead of Notepad, any other application can be executed in an automated and highly controlled manner.
In this example, it was shown how to detect a user login occurrence and to process it by using Automation Workshop's built-in capacities as well as external programs. The described Task monitors the system for user logins.
When any user logs into the system, the approximate login date and time (depending on how much time after login the Task is specified to start in the User Logon & Logoff Trigger) is written into a text file with the same name as the currently logged-in user. Then this text file is automatically opened in Notepad, and the Task is finished.
As a result, for each user who logs into the system, there exists a text file in the C:\Logon Reports\ folder which contains all user login dates since the creation of the Task (unless the data is manually erased).
Need a helping hand?
If you have any questions, please do not hesitate to contact our support team.